

First of all you will need to install the axel download framework. So your first step to installing this script is to install the axel framework, from the terminal.
$ sudo apt-get install axel
After which you will enter your user password, press "enter", and also press "y" when prompted. After which you will just wait for the "$" prompt to appear, that signals your software is installed.
The rest is really easy. Start by downloading the script from this link, here. Make sure to download this to a place, that is easy to remember.
Next go to that location. I often right click on the Firefox download manager, and select "go to location".
Next you will need to place the script into the /usr/sbin folder.
If you still have your terminal open you can use the following commands:
$ cd Downloads
~cd is much like it is in the DOS command line shell from MS, because it stands for change "Change Directory", and performs the same function.
$ sudo mv apt-fast.sh /usr/sbin/apt-fast~sudo is needed to add, remove, or modify files within system file directories.
~mv is the command for moving a file for one place to another. This is the same as cp(copy), except that after the copy from place A, to place B the file is deleted from the original location.
~when using a mv, or cp command the first file name is the original name/location of the file. The location of the file was not used in this command because it is assumed, that you are already located in the directory(folder); that contains the script file.
~Notice that the second file has not ".sh" extension @ the end of it. This is how files are renamed within the Linux terminal, by the destination being different from the original file.
The main benefit from this command is that you can move the script to the correct location, and rename it at the same time.
You will also need to add permissions for the script to be executable with the following command.
$ sudo chmod +x apt-fast
Now for the GUI(graphical User interface) way of doing things.
(this assumes that you downloaded the script to your Downloads directory(folder), within your User home folder.)
Step 1)Change the file name to just apt-fast.
*Downloads is the default location for your Firefox downloads.*
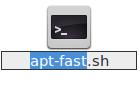 First rename the scrip to just apt-fast.
Step 2)Change the permission of the file to allow for the execution of the code.


PRO USER TIP: context menu
keyboard- shortcut.
"shift" + "F10"
*This will only help if the file is selected(highlighted)*
Then the following menu will appear.

Now you will need to click on the "Permissions" tab. The "permissions" tab is located in between the selected "Basic" tab & the "Open with" tabs.

Now all you need to do is to click the check box "Allow executing file as program", and click close the window.
To open up Nautilus with root privileges, you will first need to open the run dialogue, and then type in the following command:
"alt" + "F2"
gksu nautilusMake sure to substitute <your_user_name> with the user account you are logged in under. If not you will not find the folder when you open Nautilus with root permission.
 |
| This will open up a nautilus file manager with root power. |
 |
| Enter your password, and select "OK". |
Next you will need to navigate to your users Downloads folder.

From this screen there are two ways to navigate to the "/" of the file system. You could either use the keyboard shortcut "alt" + <up arrow>, or you could click on the little Less than sign, and the small hard drive that appears.
 |
| select the highlighted home folder. |
You will find a folder within this "home" folder, that is named <your_user_name>; that contains your "Downloads" folder.
 | |
| I have two user folders within my "home" folder, because I have separate user accounts for me and my roommate. |
PRO USER TIP: In order to use the split view for easy drag/drop of your files within nautilus you can use the "F3" key to toggle split pane view, or navigate the view drop-down menu and select "extra pane". When you are in split pane view the window that has a white background, is the one that is active.
Now you will need to double-click the "Downloads" folder.


Now you will need to navigate to the / of the file-system, before navigating to the /usr/sbin folder. You can do this by selecting the small Hard drive icon, just to the Left of the home button. From here you will need to double-click on the "usr", and "sbin" folders in turn; until you end up at the following location.
 |
| Click through the highlighted /usr folder, and also double click the /usr/sbin folder within the /usr folder. Make sure not to put it in the /sbin directory on the base of the file-system. |
 |
| congratulations you finally found the /usr/sbin folder. |
Now you will need to right click anywhere that is not a file, until you find the following menu; and select "paste".

Now your apt-fast script is installed, and here is how you use it. When you would normally use a command like apt-get update, now you will use apt-fast update. It is that simple.
"Ctrl." + "alt" + "t" :opens a terminal window, without having to search for your distribution's terminal program within a burred menu.
 |
| PRO_User_TIP: Notice how I added the apt-fast upgrade, and the apt-fast upgrade commands together with the double ampersand symbols; so that I don't have to wait for one command to complete before starting another. |
 |
| Enter your password when prompted, and don't panic if you don't see anything when you type your password; just do it and press "Enter". |
 |
| notice the three connection's, all collecting bits of the file; all at the same time. |
 |
| type "y", and "enter" when prompted by the [y/n] prompts. All activity will stop until you choose "y" or "n". |
 |
| Done already? verify that all packages are installed properly. If errors are found, run apt-get clean as root and try again using apt-get directly. |


 Many of you have probably noticed how many screen-shots I use within my Blogs, so I have decided to demonstrate just how easy it is to capture screen-shots on a Linux Operating system.


