Google+ open-source construction: nautilus Google+
Showing posts with label nautilus. Show all posts

Friday, December 30, 2011

five things that I wish Ubuntu could Learn from Kubuntu & KDE


KDE Logo
I learned Linux from a gnome/Ubuntu point of view and I will continue to use gnome on my desktop.  With that said I have really been digging on my Kubuntu installation on my netbook for the last week, so I decided to post a list of things I wish Ubuntu could do. I will also list some things that frustrate me about Kubuntu.


What I really wish Ubuntu would Learn from Kubuntu:

~ 1 I wish the nautilus file mgr. would have a pause button for file transfers.

This is one of the greatest strengths of the dolphin file manager. There have been a few times where my laptop was almost out of charge in the middle of a file transfer. If I could have just paused it, then hibernate/suspended  the transfer until I plugged in my charger; I would not have had to franticlfy look for my charger. I used to use the terra copy freeware program to get this functionality in Windows, and it is being bundled into windows 8. I don't understand why a pause button isn't standard on all Operating system file managers. :/
 ~2 I wish  that Nautilus would have a one click way to select/de-select multiple files.

In dolphin when you hover your mouse/tracpad cursor over a selected item, there appears a Plus button which selects the file with one click. If you select a bunch of files, but change your mind about one of them; then just simply click the minus button, and it will be de-selected from the list of files. This feature is extremely handy when sorting files to copy/move, as well as delete. Windows has a similar feature, that shows a check-box that allows you to select/de-select files; but it is buried within the file options...;D~ In all fairness you could still do what I learned to do in Windows XP and Ubuntu, which is just hold the ctrl. key to select/de-select files in Kubuntu as well.

~3 I wish that Ubuntu would learn to integrate desktop customization like KDE has.

What I mean by this is that in Kubuntu KDE user created themes are installed, with ridiculous ease. For example if I dig into the the workspace appearance, under the system settings, you will find the cursor theme tab. Under the cursor theme tab, there is a "Get new theme" button. This button will show a dialouge that will show a ton of cursor themes. After which with one button, you can install the theme of your choice.

This is the  case with the several other options, and one is the login screen. Which I chose to install a "stargate" 9 chevron theme for when my Kubuntu is loading. I still have not figured out how to change the lightDM theme on my Ubuntu side YET.

~4 wish that Ubuntu would have made it as simple to re-install the xScreensaver package.

I guess that Ubuntu was trimming, and that is OK, by me. Especially since in modern computing screen-savers aren't really necessary. Kubuntu did the same thing, but they included a pop-up notification that directed me to a one-click install of a package to extend the functionality of the screen-saver, beyond just a plain boring black screen. I was disappointed that the xscreensaver-gl package in Kubuntu didn't have the matrix-gl screen-saver, until I found the ascii aquarium.

~5 I wish that Ubuntu allowed for more advance control of the Interface.

In Kubuntu I found myself able to easily disable the caps lock key. Kubuntu has mouse/tracpad gestures built right into the distribution. For the record I do really like Unity's gnome shell implementation, except for one major thing. If I zoom out into window switching mode in Unity I can only close the last active window, if I am careful with the global menu. But in the gnome 3 fall-back and Kubuntu when zoomed out in window selection mode, I can choose to select or close any of the windows displayed and the screen. Window switching mode is accessed via the top Left corner in both Kubuntu and Gnome 3 shell.

My only major frustration with Kubuntu as a whole is the plasmoid widgets did not work very well for me. I could not get half of them to work, and the other half looked like crap on my screen.

For the record I will continue to use both desktops. Ubuntu is the only Linux OS on my net-book that I can use, as a modem for my desktop, because my wifi source is in a different room.

If you want to check kubuntu out for yourself, you can download it below:

www.kubuntu.org/getkubuntu

Friday, December 16, 2011

Increase your update speed using Linux Mint: apt-fast script


I just wanted to write today about how you can use a simple script to increase your update times. Speeds, up to four times as fast have been reported using this script. It is ridiculously easy to install this script, that any script kiddie can use it.

First of all you will need to install the axel download framework. So your first step to installing this script is to install the axel framework, from the terminal.


$ sudo apt-get install axel

After which you will enter your user password, press "enter", and also press "y" when prompted. After which you will just wait for the "$" prompt to appear, that signals your software is installed.

The rest is really easy. Start by downloading the script from this link, here. Make sure to download this to a place, that is easy to remember.

Next go to that location. I often right click on the Firefox download manager, and select "go to location".

Next you will need to place the script into the /usr/sbin folder.

If you still have your terminal open you can use the following commands:


$ cd Downloads

 ~cd is much like it is in the DOS command line shell from MS, because it stands for change "Change Directory", and performs the same function. 
$ sudo mv apt-fast.sh /usr/sbin/apt-fast
~sudo is needed to add, remove, or modify files within system file directories.

~mv is the command for moving a file for one place to another. This is the same as cp(copy), except that after the copy from place A, to place B the file is deleted from the original location.

~when using a mv, or cp command the first file name is the original name/location of the file. The location of the file was not used in this command because it is assumed, that you are already located in the directory(folder); that contains the script file.

~Notice that the second file has not ".sh" extension @ the end of it. This is how files are renamed within the Linux terminal, by the destination being different from the original file.

The main benefit from this command is that you can move the script to the correct location, and rename it at the same time.

You will also need to add permissions for the script to be executable with the following command.

$ sudo chmod +x apt-fast

 Now for the GUI(graphical User interface) way of doing things.

(this assumes that you downloaded the script to your Downloads directory(folder), within your User home folder.)

Step 1)Change the file name to just apt-fast.

*Downloads is the default location for your Firefox downloads.*

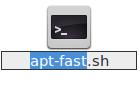
First rename the scrip to just apt-fast.
 
After the following screen, just move your cursor to the end of the line with the "end" key, or three presses of the arrow key. Once your cursor is at the end of the file name, then just simply press the backspace key three times. This will get rid of the .sh file extension. After you have done this press the "enter" key to finish renaming the file. By the way this is the same way you rename files in Windows.

Step 2)Change the permission of the file to allow for the execution of the code.

This involves a few simple clicks. First you will need to right click the menu, and select properties, at the bottom of the context menu.

PRO USER TIP: context menu
                          keyboard- shortcut.

"shift" + "F10"

*This will only help if the file is selected(highlighted)*

Then the following menu will appear.


Now you will need to click on the "Permissions" tab. The "permissions" tab is located in between the selected "Basic" tab & the "Open with" tabs.


Now all you need to do is to click the check box "Allow executing file as program", and click close the window.


To open up Nautilus with root privileges, you will first need to open the run dialogue, and then type in the following command:

"alt" + "F2"
gksu nautilus
Make sure to substitute <your_user_name> with the user account you are logged in under. If not you will not find the folder when you open Nautilus with root permission. 

This will open up a nautilus file manager with root power.

Enter your password, and select "OK".


Next you will need to navigate to your users Downloads folder.

From this screen there are two ways to navigate to the "/" of the file system. You could either use the keyboard shortcut "alt" +   <up arrow>, or you could click on the little Less than sign, and the small hard drive that appears.
select the highlighted home folder.
 You will find a folder within this "home" folder, that is named <your_user_name>; that contains your "Downloads" folder.

I have two user folders within my "home" folder, because I have separate user accounts for me and my roommate. 
PRO USER TIP: In order to use the split view for easy drag/drop of your files within nautilus you can use the "F3" key to toggle split pane view, or navigate the view drop-down menu and select "extra pane". When you are in split pane view the window that has a white background, is the one that is active.

Now you will need to double-click the "Downloads" folder. 

Now that you are within the "Downloads" folder as root, you will need to right-click & select the copy option. 

 
Now you will need to navigate to the / of the file-system, before navigating to the /usr/sbin folder. You can do this by selecting the small Hard drive icon, just to the Left of the home button. From here you will need to double-click on the "usr", and "sbin" folders in turn; until you end up at the following location.

Click through the highlighted /usr folder, and also double click the /usr/sbin folder within the /usr folder. Make sure not to put it in the /sbin directory on the base of the file-system.
congratulations you finally found the /usr/sbin folder.
Now you will need to right click anywhere that is not a file, until you find the following menu; and select "paste".
 
Now your apt-fast script is installed, and here is how you use it. When you would normally use a command like apt-get update, now you will use apt-fast update. It is that simple. 

Let's open a terminal to check it out:

"Ctrl." + "alt" + "t" :opens a terminal window, without having to search for your distribution's terminal program within a burred menu.
PRO_User_TIP: Notice how I added the apt-fast upgrade, and the apt-fast upgrade commands together with the double ampersand symbols; so that I don't have to wait for one command to complete before starting another.
Enter your password when prompted, and don't panic if you don't see anything when you type your password; just do it and press "Enter".

notice the three connection's, all collecting bits of the file; all at the same time.
type "y", and "enter" when prompted by the [y/n] prompts. All activity will stop until you choose "y" or "n".
Done already? verify that all packages are installed properly. If errors are found, run apt-get clean as root and try again using apt-get directly.

Tuesday, November 29, 2011

Linux Mint 12 review: pt. 3 (B) 10 things 2 do after fresh install.

Top 10 things I do after a fres install continued:

3~ Disable auto-run. This is irritating to my control freak nature.

Notice the check box, at the bottom. 

All settings button leads you back to the main settings menu which looks like this.


4~ set up any necessary user accounts, depending on your specific situation.

I set myself as the admin, and my rommate's account to a standard user.
The plus and minus keys add/remove accounts. You must click the unlock button, as administrator to change any account settings.
Notice auto-login is switched on. I only recommend this,
with a standard user account on a Desktop PC. 

 5~ Change the Wallpaper of the back-ground. I chose the cube wallpaper. Although I really like a lot of the mountain backgrounds in Mint 12.

Notice the Dual-screen working very nicely.
I had to set this up in the Nvidia X server settings.


6~ Install Drop-box to sync my documents.

7~ mouse settings

I increased acceleration & sensativity, and checked show  position of pointer
when the control key is pressed. 

8~ set the nautilus file manager to open folders w/ a single click.

Just click the single click to open items radio button,
and the change is instantly applied.
To get to the File Management preferences go to the edit menu, and down to preferences.

9~ Make sure the Power/Screen settings are set properly for my situation.

On a laptop my main concern is power consumption, and on a Deskotp my main concern is making sure that I can watch movies from start to finish.

The default setting was to turn off after a half an hour.
I also switched the screen lock to off.
I choose Don't suspend when inactive.
Since this is a Desktop critically low power is pointless.
~10 customize my web browser(s) to my individual needs.

In chrome this is super-simple, because I have my g-mail account linked to my browser settings. So all of my extensions, web apps, and book-marks are linked in one easy step.

In Firefox I have to manually re-install all of my extensions, theme, and most common sites I visit I sync as well. I protect my Fire-fox passwords with a Master password.

After I have synced Fire-fox on-line, I choose to sync my  fire-fox data with chrome. Then I put a similar Master password to Google chrome.

Please check out Linux Mint on Distrowatch.com for more information & download it for yourself.

Link: Linux Mint's distrowatch page.
 I would also encourage you to go to the Linux Mint page, and create a user account so that you can help create the ratings for the software you enjoy. After all that is what has made Linux so resilient from the beginning, was peer review of the code. This gives every Linux mint user the chance to be a much needed part of the community. Microsoft or apple tell you what is good by marketing to you, but Linux Mint asks you to Learn from your peers. The Linux Mint community, also has an incredibly helpful community. My (LM) U/N is: zarr0BoogZ.

http://community.linuxmint.com/

Linux Mint 12 review: pt. 3 (A) 10 things 2 do after fresh install.


I would like to start this post with the first things that I do after a clean install.

1~update video drivers
2~initial update
3~Disable auto-run
4~ set up any necessary User accounts/permissions.
5~change the default Wallpaper.
6~Install DropBox to sync my documents.
7~ modify mouse settings.
8~set nautilus to open folders w/ a single click
9~ set the power/screen settings.
10~ modify my  Firefox && chrome web-browsers to suit my needs.

One of the greatest things about Linux mint, is that you don't have to install your codecs to be able to play your media manually after installation. 

CODEC:  " co der- dec oder" a piece of software that is installed to decode your media files. Fore example MP3.
http://en.wikipedia.org/wiki/Codec 

1)update to the newest stable video drivers since I have an Nvidia graphics accelerator card. Nvidia Geforce 210. Cheapest card I could get that was slim enough to fit, a gigabyte of video memory, and HDMI/VGA/DVI.

Searching for available drivers...
I always choose to activate the recommended driver version.
2) initial update. This takes the longest, but is the most crucial.

Your update time may vary, based on your Connection speed to the Internet. 
If you are really curious  about what files Linux Mint is downloading,
click the Right arrow to open up this dialogue. 


The first window of the update manager.

Taking a peek at where the real work getting done in Linux Mint 12

I hope you enjoy this Blog post, and be sure to check out part B...


Google+