Google+ open-source construction: Ubuntu Google+
Showing posts with label Ubuntu. Show all posts

Tuesday, June 19, 2012

security Class101:Day 1 KeePassX && Linux

 Using KeePassX 2 increase your security in Linux

I have been using KeePassX for my passWord data-base manager, for over a year now. That not only means that my pass-words are as long and complicated as possible, and all completely unique. Although I sometimes use web-services like twitter, google, my launchpad Oauth link, or facebook to login to my passwords. I have been switching one of these per week, which makes cracking my passwords, highly unlikely.


I like to make notes during the creation of an account, any information I found out about what types of passwords the data-base supports. I really wish there were simple tags on web-sites when creating passwords so I can know the most complicated I can make the passwords. Which I have found in the past, but it is generally rare.

You can easily install KeePassX on any GNU/Debian/Ubuntu(Linux) by running the command:

$ sudo apt-get install keepassx

<enter>

<PW>

<enter>
(install keepass2 for more M$ compatibility)

I do want to make clear that KeePassX is compatible w/ LastPass, but not many windows/mac based password managers. Since I use only Linux keePassX is perfect for my situation.

I usually keep keePassX on my toolbar dock. In Unity or Gnome-shell just open the application(app), then just right click and select "lock to panel" or similar command in "G-S".

So you may ask why I use keePassX and LastPass. I say that I like having my web-passwords mainly kept in LastPass, while I like the extra options for generating passwords, and there are other passwords that I only keep in my KeePassX data-base. Some of these passwords are: SSHkeys, IceCast Server, LastPass Master-Password(My LastPass Never remembers my Password, so I have 2 copy it in each time), and my public-pvt. OpenGPG keys.

Power-user top:

Ctrl + P generate semi-random password.

You can also check/uncheck options like:

allows you to do custom characters, exclude look-alike characters, make sure the passwords contain char. from different groups.

you compare and tell me. 

Also if you do like me and generate passwords from KeePassX, then all it takes is clicking that "save site" in the box that drops down from LastPass in your browser. From that point onwards you can just click "auto-fill to fill in your pass-words. Then just click the regular "log-in" button to get logged in.

the lock screen. You must unlock, before your next copy/paste. I set my desktop to be very lenient; while my net-book keePassX locks and deletes the paste buffer. 

you could also use a stupid-complicated password in a text file, called a keyFile.


What I highly recommend in getting started w/ a secure pass-word data-base is to make a list of your most often used/needed passwords: Here would be my list:

~Amazon/Ebay/pay-pal
~Google/twitter/Facebook/OpenAuth(my OpenID Link 2 my LaunchpadID)
~del.ic.ious/digg/reddit/stumbleupon/P2PU/identi.ca/linkedIn
~facebook/mySpace/couchSurfing/
~tumblR/wordPress/ping.fm/seismec/everNote(on-line notebook)/diigo(highlighting)
~mint-forums
~liveMocha/typingWeb/lumosity
~digsby/trillian/aol/icq/yahoo!
~last.fm/pandora

That is a lot, but I share a lot of articles on the Net. Most people will probably only need a dozen or so passwords to be satisfied, especially w/ most web apps having facebook, twitter, google, && OpenID link. Along w/ a few like E-bay, Amazon, and Pay-pal. Although I would suggest getting a second factor authentication token for your on-line banking either from your $ site(paypal for example), or get a yubi-key for $20 tied to your LastPass.

read fields for tips. repeat is red, because it does not match the first PW field.

Thursday, June 7, 2012

Humble indie bundle...only one week left.

Humble-Indie bundle...only one week left...

I want none of our readers no matter what platform they use to lose out on this incredible Bundle.


I will talk briefly about what games I am most looking FWD 2, my thought's on the USC(Ubuntu-software-Ctr.) installations, && a little bit of controversy surrounding one of the games and where I stand personally on that issue. Especially as a recent purchaser of the Humble Bundle-V.I definitely wanted to play all of these games before I publish this review; so I can talk about it in the post this time around.

While I could have said forget writing another Blog post about the humble-bundle, I decided it's my duty as a geek to write about games I enjoy on a free-software platform. I will also speak about some of the possible far-reaching consequences of the Humble-bundle to the Linux/BSD communities.

I would also really like to see the humble bundle folks to make widgets that Bloggers such as us can embed within their web-pages. That we we could get spontaneous && hopefully close to instantaneous facts, and figures about who is giving more, how many bundles have been sold, how many days left...etc..

When this will be posted there will be about 9 days left with well over 3 Million dollars for great charities like the FSF(free software foundation), and child's play charity. Linux has consistently won in donations where the Users have the choice to pay as much or little as they so choose. I believe that this is the case for two reasons: one>Linux folks don't have to pay outrageous fees for their hardware/software, so they have extra cash for games, and B>we're sick of getting looked over by companies making AAA titles.

I had mixed results with the ubuntu software center. So please do yourself a favour and only pay for one game @ a time, although I am sure they will work all of that out in time. Also please note that in my opinion the more private(paid software private repositories)that you have on a system, the Longer your update command will work. I often stop just the private * PPAs so that my updates go faster. Although this could just be my horrible Internet connection once again. 

Although all that will change once Linux gets steam, and the source engine for Linux natively. I think this could start the famous Bell curve for Linux. two things that could accelerate this trend even more is if Linux gets seen as enough market share to make adobe fully supported on *NIX systems, or if NetFlix(a co. w/ Linux behind the scenes to run the streaming)were to drop Silverlight making Netflix instantly compatible with most computer platforms. While that is a best case scenario, it does fall within the realm of plausible within the next five years. Especially with the vavaldi/Ubuntu open-source tablets in the near future. Also Ubuntu will look mighty attractive to NetFlix once they start shipping to people's home with an OpenOS.

Who knows one day  there might be a fair and balanced market between "community-supported software", and "corporation developed software". In the more short term I am drooling over the games I have recently downloaded. Although that is subjective, because these are pretty large games compared to previous bundles. Psychonauts is 4.4GB with really intensive gfx. There are really only two games that will work on my netbook more than likely:Limbo, and superbrothers sword and sorcery. All of the other games should play fine on my desktop as soon as I get them. I hope that will be soon. I managed to get superbrothers:sword & sorcery and Limbo, and Bastion  installed on the desktop.

To install Bastion from the .sh file just type this command into the terminal while located within the download directory:

$ sudo bash ./Bastion-HIB-2012-06-01-1.sh <enter> <password>


follow the on-screen prompts...it works fine to keep the defaults, and check register the software upon installation.


I recommend either Vuze, or deluge bit-torrent clients within Linux. This way you help take some of the server costs upon yourselves as part of the community. Torrenting legally has a purpose like to share your favorite Internet show...say...the LinuxActionShow(LAS). I am also torrenting all of the soundtracks, once again seeding until the close of the humbleBundleV.

There was a little bit of controversy surrounding the game Limbo. Basically the developers worked with the codeWeavers project(paid support--customization of wine) to wrap the neat little game inside of a wine wrapper. Although to be fair it is distributed as a 32 or 64bit  .deb/.rpm files for end of distribution. Also if the installer for bastion just compiles a temporary .deb package on Ubuntu


I played the first story...do deaths round on Bastion, and I know I could get hooked way too easily. It ran great on my Desktop HP Ubuntu 12.04LTS. I did manage to get my dart gun, shield, and hammer. :D


In Sword brothers:sword & sorcery didn't really hold my attention, which is weird b/c usually I luv pix-elated old-school styled games. In the games story it explained that the entire game takes 35-45mt.

In Limbo I was able to make the little shadow boy, jump over a moat and that was that. I will probably end up watching some you-tube videos on how to kick butt in Limbo. The launching, smooth audio/video, and a clean shut-down, along with no lag between menus. All thanks to the Code-Weavers project.  Although I don't really mind a well working whine wrapped in a .deb Debian package, but I did sign the partition to try to keep as much of the games as native as possible in Linux. I also think source-tarbell, .rpm, and .deb should be the only really needed packages should keep 95%. These are all my opinions.


I played Amnesia, for just a few minutes. I didn't need to play it very long to be blown away, and to feel my future free time slipping away...


I was slightly limited by space available in my different distrobutions on my desktop PC. the only distro w/ enough space was my KDEmint. Although the installer finished unlike Ubuntu, I was unable to successfully launch the game. I don't mind it being so huge, because the cut-scenes looked really entertaining.


UPDATE:

The humble-bundle foldks have added three more games to the humble-bundleV:Super-meat boy, Braid, and Lone Survivor. Superr-meat boy and braid are already available in the ubuntu software-center(I also wrote about them in my post about the humble-bundle4. Braid was a downloaded from the x-box360 game for a while, and Braid has consistently topped the charts of the most bought Ubuntu game. Lone-survivor looks to be a retro 16-bit styled, post-apocalyptic survivor hallucination story.


Sunday, June 3, 2012

Noob Ubuntu install party...

the now endangered pangolin...
Noob Ubuntu Install party.....

I might be exaggerating a bit when I say noob. She's been using Ubuntu since @ least Karmic Koala. She just had a different friend install it for her. By install it I mean install it badly...

There were actually three separate SWAP partitions.  SWAP is what caches the applications, along with the Main system memory. I had to use the built in "disc tools" && "Gparted" to delete & set new partition boundaries,  and the Ubuntu installer 2 set format/mount points:35(GB) /(root/base of the file system)/(100gb /home). I like keeping the system files(that keep the Operating system operating), separate from the user files/settings. That way even if the noob user fills their hard drive w/ different Linux distributions they want to try the operating system will keep well...Operating.

official logo


Although she is new to the Unity interface. She has never really taken to multiple workspaces, until 12.04 Precise Pangolin. I also showed it off to her friend who is always asking me about why her window$ computer does crazy things. I haven't Used windows in almost 6 months...:/

I always make sure that codec/dvd support are configured, along w/ all updates. I also did the fastest server test. I set the updates to security(auto update/install), regular updates weekly, and kept it LTS(Long-term support 4 the next 5 years version updates only selected. I installed very few apps:Google chrome/talk-plugin, FBreader(e-book, pdf, epub...etc reader), synaptic(mainly so she can search wallpapers & get former Ubuntu/Gnome/KDE wallpapers. The initial backup of the /home folder(w/ the downloads folder included) to her external hdd. Before the backup, we backed up a dying Ipod and verified that her Ipod-touch works perfectly.

baby pangolin...their @ least cut when their Little.
All in all the whole operation was about 3 1/2 hours long give/take. It would have been much faster w/ My readt to go USB thumb drive. On older laptops it is common for the BIOS to have options for USB HDD, USB CDrom, USB super disk, but none of those options work. As was the case yesterday when my usb flash drive, and external DVD burner refused to boot the OS. I ended up installing from the HP from the internal combo drive.


Overall this was one of the smoothest installations I have done in a long time.


Friday, December 30, 2011

five things that I wish Ubuntu could Learn from Kubuntu & KDE


KDE Logo
I learned Linux from a gnome/Ubuntu point of view and I will continue to use gnome on my desktop.  With that said I have really been digging on my Kubuntu installation on my netbook for the last week, so I decided to post a list of things I wish Ubuntu could do. I will also list some things that frustrate me about Kubuntu.


What I really wish Ubuntu would Learn from Kubuntu:

~ 1 I wish the nautilus file mgr. would have a pause button for file transfers.

This is one of the greatest strengths of the dolphin file manager. There have been a few times where my laptop was almost out of charge in the middle of a file transfer. If I could have just paused it, then hibernate/suspended  the transfer until I plugged in my charger; I would not have had to franticlfy look for my charger. I used to use the terra copy freeware program to get this functionality in Windows, and it is being bundled into windows 8. I don't understand why a pause button isn't standard on all Operating system file managers. :/
 ~2 I wish  that Nautilus would have a one click way to select/de-select multiple files.

In dolphin when you hover your mouse/tracpad cursor over a selected item, there appears a Plus button which selects the file with one click. If you select a bunch of files, but change your mind about one of them; then just simply click the minus button, and it will be de-selected from the list of files. This feature is extremely handy when sorting files to copy/move, as well as delete. Windows has a similar feature, that shows a check-box that allows you to select/de-select files; but it is buried within the file options...;D~ In all fairness you could still do what I learned to do in Windows XP and Ubuntu, which is just hold the ctrl. key to select/de-select files in Kubuntu as well.

~3 I wish that Ubuntu would learn to integrate desktop customization like KDE has.

What I mean by this is that in Kubuntu KDE user created themes are installed, with ridiculous ease. For example if I dig into the the workspace appearance, under the system settings, you will find the cursor theme tab. Under the cursor theme tab, there is a "Get new theme" button. This button will show a dialouge that will show a ton of cursor themes. After which with one button, you can install the theme of your choice.

This is the  case with the several other options, and one is the login screen. Which I chose to install a "stargate" 9 chevron theme for when my Kubuntu is loading. I still have not figured out how to change the lightDM theme on my Ubuntu side YET.

~4 wish that Ubuntu would have made it as simple to re-install the xScreensaver package.

I guess that Ubuntu was trimming, and that is OK, by me. Especially since in modern computing screen-savers aren't really necessary. Kubuntu did the same thing, but they included a pop-up notification that directed me to a one-click install of a package to extend the functionality of the screen-saver, beyond just a plain boring black screen. I was disappointed that the xscreensaver-gl package in Kubuntu didn't have the matrix-gl screen-saver, until I found the ascii aquarium.

~5 I wish that Ubuntu allowed for more advance control of the Interface.

In Kubuntu I found myself able to easily disable the caps lock key. Kubuntu has mouse/tracpad gestures built right into the distribution. For the record I do really like Unity's gnome shell implementation, except for one major thing. If I zoom out into window switching mode in Unity I can only close the last active window, if I am careful with the global menu. But in the gnome 3 fall-back and Kubuntu when zoomed out in window selection mode, I can choose to select or close any of the windows displayed and the screen. Window switching mode is accessed via the top Left corner in both Kubuntu and Gnome 3 shell.

My only major frustration with Kubuntu as a whole is the plasmoid widgets did not work very well for me. I could not get half of them to work, and the other half looked like crap on my screen.

For the record I will continue to use both desktops. Ubuntu is the only Linux OS on my net-book that I can use, as a modem for my desktop, because my wifi source is in a different room.

If you want to check kubuntu out for yourself, you can download it below:

www.kubuntu.org/getkubuntu

Friday, December 16, 2011

Increase your update speed using Linux Mint: apt-fast script


I just wanted to write today about how you can use a simple script to increase your update times. Speeds, up to four times as fast have been reported using this script. It is ridiculously easy to install this script, that any script kiddie can use it.

First of all you will need to install the axel download framework. So your first step to installing this script is to install the axel framework, from the terminal.


$ sudo apt-get install axel

After which you will enter your user password, press "enter", and also press "y" when prompted. After which you will just wait for the "$" prompt to appear, that signals your software is installed.

The rest is really easy. Start by downloading the script from this link, here. Make sure to download this to a place, that is easy to remember.

Next go to that location. I often right click on the Firefox download manager, and select "go to location".

Next you will need to place the script into the /usr/sbin folder.

If you still have your terminal open you can use the following commands:


$ cd Downloads

 ~cd is much like it is in the DOS command line shell from MS, because it stands for change "Change Directory", and performs the same function. 
$ sudo mv apt-fast.sh /usr/sbin/apt-fast
~sudo is needed to add, remove, or modify files within system file directories.

~mv is the command for moving a file for one place to another. This is the same as cp(copy), except that after the copy from place A, to place B the file is deleted from the original location.

~when using a mv, or cp command the first file name is the original name/location of the file. The location of the file was not used in this command because it is assumed, that you are already located in the directory(folder); that contains the script file.

~Notice that the second file has not ".sh" extension @ the end of it. This is how files are renamed within the Linux terminal, by the destination being different from the original file.

The main benefit from this command is that you can move the script to the correct location, and rename it at the same time.

You will also need to add permissions for the script to be executable with the following command.

$ sudo chmod +x apt-fast

 Now for the GUI(graphical User interface) way of doing things.

(this assumes that you downloaded the script to your Downloads directory(folder), within your User home folder.)

Step 1)Change the file name to just apt-fast.

*Downloads is the default location for your Firefox downloads.*
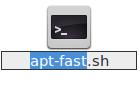
First rename the scrip to just apt-fast.
 
After the following screen, just move your cursor to the end of the line with the "end" key, or three presses of the arrow key. Once your cursor is at the end of the file name, then just simply press the backspace key three times. This will get rid of the .sh file extension. After you have done this press the "enter" key to finish renaming the file. By the way this is the same way you rename files in Windows.

Step 2)Change the permission of the file to allow for the execution of the code.

This involves a few simple clicks. First you will need to right click the menu, and select properties, at the bottom of the context menu.

PRO USER TIP: context menu
                          keyboard- shortcut.

"shift" + "F10"

*This will only help if the file is selected(highlighted)*

Then the following menu will appear.


Now you will need to click on the "Permissions" tab. The "permissions" tab is located in between the selected "Basic" tab & the "Open with" tabs.


Now all you need to do is to click the check box "Allow executing file as program", and click close the window.


To open up Nautilus with root privileges, you will first need to open the run dialogue, and then type in the following command:

"alt" + "F2"
gksu nautilus
Make sure to substitute <your_user_name> with the user account you are logged in under. If not you will not find the folder when you open Nautilus with root permission. 

This will open up a nautilus file manager with root power.

Enter your password, and select "OK".


Next you will need to navigate to your users Downloads folder.

From this screen there are two ways to navigate to the "/" of the file system. You could either use the keyboard shortcut "alt" +   <up arrow>, or you could click on the little Less than sign, and the small hard drive that appears.
select the highlighted home folder.
 You will find a folder within this "home" folder, that is named <your_user_name>; that contains your "Downloads" folder.

I have two user folders within my "home" folder, because I have separate user accounts for me and my roommate. 
PRO USER TIP: In order to use the split view for easy drag/drop of your files within nautilus you can use the "F3" key to toggle split pane view, or navigate the view drop-down menu and select "extra pane". When you are in split pane view the window that has a white background, is the one that is active.

Now you will need to double-click the "Downloads" folder. 

Now that you are within the "Downloads" folder as root, you will need to right-click & select the copy option. 

 
Now you will need to navigate to the / of the file-system, before navigating to the /usr/sbin folder. You can do this by selecting the small Hard drive icon, just to the Left of the home button. From here you will need to double-click on the "usr", and "sbin" folders in turn; until you end up at the following location.

Click through the highlighted /usr folder, and also double click the /usr/sbin folder within the /usr folder. Make sure not to put it in the /sbin directory on the base of the file-system.
congratulations you finally found the /usr/sbin folder.
Now you will need to right click anywhere that is not a file, until you find the following menu; and select "paste".
 
Now your apt-fast script is installed, and here is how you use it. When you would normally use a command like apt-get update, now you will use apt-fast update. It is that simple. 

Let's open a terminal to check it out:

"Ctrl." + "alt" + "t" :opens a terminal window, without having to search for your distribution's terminal program within a burred menu.
PRO_User_TIP: Notice how I added the apt-fast upgrade, and the apt-fast upgrade commands together with the double ampersand symbols; so that I don't have to wait for one command to complete before starting another.
Enter your password when prompted, and don't panic if you don't see anything when you type your password; just do it and press "Enter".

notice the three connection's, all collecting bits of the file; all at the same time.
type "y", and "enter" when prompted by the [y/n] prompts. All activity will stop until you choose "y" or "n".
Done already? verify that all packages are installed properly. If errors are found, run apt-get clean as root and try again using apt-get directly.

Monday, December 12, 2011

How 2: take screen-shots with Linux.


Many of you have probably noticed how many screen-shots I use within my Blogs, so I have decided to demonstrate just how easy it is to capture screen-shots on a Linux Operating system. 


Most of the time when you want to take a screen-shot of your desktop, you want to either take a picture of either your whole desktop or an individual window. In order to do this you will need to Learn two hot-key keyboard combinations.

hitting the print screen button by itself will take a simple screen-shot of the entire desktop. This is usually abbreviated as "prt scr".

If you are on a smaller computer, the "prt scr" might be a dark blue colo, which is the case on my LGx120 netbook. So when I want to press the "prt scr" key on my netbook I have to hit the "fn" + "prt scr" keyboard combination to trigger a screen-shot of my desktop. On my net-book the "prt scr" button is inegrated with the "pg up"(page up) key.
The next key combination you will need to Learn is the what triggers a screen-shot of the active window on a Linux computer. The key combination is "Alt." + "prt scr". Which also means that if I want to take a screen-shot of an active window, while using my net-book; I have to hit "fn" + "alt" + "prt scr".
What happens next, is what makes taking screen-shots in Linux so much easier than windows. In windows the key combinations are the same, but what happens after a correct key combo press is very different. Watch what happens in Linux:

a screen-shot save preview window, of me starting to write this Blog within Blogger.
Now you may think that I have an incredibly expensive wide-screen at home. This is actually a dual-screen desktop PC, thanks in part to my friend Robert who gave me a second monitor.

If you want to know how to configure you Linux PC, with a dual-screen setup then please check out a previous post here.

If the save in folder is where you want to save your picture, then just click save. You could also just hit enter, or hit "alt." + "S". If you want to save to a different folder, like the a folder that you create just for a series of screen-shots; then select other from this drop down menu.


Windows in contrast does not give you a preview window, of the image you just captured. This confused me when I first learned the windows way. Windows assumes that you already have a window open that you want to place the image in. Once a program is open like an office document, or the GIMP on windows then you paste it in. You can do that with the "ctrl" + "V " keyboard shortcut, or right click and select paste from the context menu options. For a better explanation than I can give please click here.
Wilber the GIMP mascot.

I sometimes choose to use the (GNU Image manipulation Program) to crop, and re-save my pictures.

Here is a short, and simple video that describes how to crop, and re-save an image that you have captured using the GIMP.


 Now that will cover your needs 98% of the time. But what if you want to capture a menu in action. You may want to show your viewers what the menu looks like, that you are trying to describe. In Linux you cannot take a screen-shot while there is a window menu active. You also cannot take screens of tool-tips.


That is where the screen-shot tool shutter comes into play. There are many things that you can do with shutter that really help you speed up the screen-shot process, if you are like me and take tons of screen-shots.

main shutter application of shutter.
Shutter features:

  • Screen-shot session management.
  • Blur sensative data from pictures.
  • Highlight important data in multiple ways. 
  • Crop your selected picture.
  • Set a timer for when to snap the screen-shot.
  • Select an active menu, or series of menus for a screen-shot.
  • Select an active tool-tip for your screen-shot. 
  • Upload to an FTP file server.
  • Upload directly to your Ubuntu one account.
  • Choose whether or not to include the cursor in your  screen-shot.
  • Choose to let shutter handle your key-board combinations, for screen-shot. (aka..."prt scr" && "alt" + "prt scr")

Shutter is included in both the Ubuntu/Linux, and Linux Mint repositories.

Although the preferred way to do this is through the Linux terminal. That way when a new version is available you will have access to it right away. There is generally a lag in time between when a new version is posted to a repository, and when it is available for your distribution's software manager.

If you wish to earn geek credit, and get the newest application updates as soon as they are released; then do the following:

"ctrl" + "alt" + "T" ~ Launches a terminal window
 copy and paste the following commands into your terminal:
 $ sudo apt-add-repository ppa:shutter/ppa
press [enter] when you reach this screen to add the PPA.

{enter password when prompted, and hit return}
gpg keys are encryption keys that verify your software is malware free, and was not corrupted during download.

$ sudo apt-get update && sudo apt-get install shutter
**you may need to type a [y] if prompted.**
 I truly hope everyone who has read this post, has learned as much as I did writing it. It is highly likely that I will write a follow up post on the screen-shot tool "shutter".

Sunday, December 11, 2011

DJL-Linux gaming evolved


I have heard many people think that there is no good games for Linux. Now I could get furiously mad, because I know the truth; or I could just show you truth.

Featurs:
~Inspired by Valve's Steam platform for windows.
~simple install_I will walk you through it.
~works on any Gnu/Linux distribution.
~has 156 current games as of this writing.
~written in python 2.5
~Licensed under the GNU public license, so it is fully open-source.
~allows for easy one-click install/un-install of games.
~Through the use of plugins allows for in-game chat on certain games.
~98% of the software has a free-ware or GNU public license.

Easy install:

step one:

click on this download link to download the compressed archive. I recommend saving this file to your Downloads folder within your User's home folder.


step two:

uncompress the archive. To do this simply right click on the compressed archive, and click "extract here".

step three:

navigate within the newly created djl folder. next right click anywhere in that folder, that is not a file or folder. In the context menu that shows up, you will need to click "open in terminal".

step four:

type in the next command:

$ sh djl.sh

***Please note that you may need to input this command into your terminal before step four will complete successfully and launch djl....$ sudo apt-get install python-Qt4***

**Also note that in my Linux mint 12 install I had to click the button on the main screen of djl "add a shortcut on KDE/Gnome panel".** 
step five: 
Install games.
Next click on the repository tab.  Once you have found a game that you want, all you need to do is to click the install button. to watch the downloads/installations click on the Downloads tab on the far Left of the screen.

notice that I am downloading to install the game Wolfenstein: Enemy territory.


Now I would like to show you some of my top ten favorite games within the djl game manager.

open sonic-A well done sonic the hedgehog game licensed under the GPL.
This game has an innovative tag team system.


smokin-guns-A firt person 3D shooter game in a spaghetti western style.


Alien-Arena-A 3D FPS, where you destroy random aliens.


ASCIIportal-A 2D portal game, that looks like it came from the days of the comidore 64.


digital paint paintball- A paint-ball 3D FPS.


Neverball-A 3d ball rolling game. you control the tilt of the landscape through your mouse/tracpad, while you try to get enough stars, avoid obstacles, and finish by ending in the finish hole.


NeverPutt-A 3D miniature golf game similar to neverball.


warsow-A cell-shaded 3D FPS game. Also available for mac or windows, so your friend's can play along.


super tux-kart-a fun little game similar to mario-kart in play style, but with open-source mascots for characters.


racer-a great Racing simulater, that started as a driving simulator. This game was based on the source code from the open-source racing game torcs.


djl home page
djl description
Download djl

list of available games on djl game manager

Google+